
Your tires are the only part of your car that ever touches the road every turn, stop, and swerve depends on the thin strip of rubber connecting you to the pavement. Yet tread depth is one of the most overlooked maintenance checks drivers make. As tread wears down, your tires lose their ability to channel water, snow, and debris away from the contact patch, which means longer stopping distances, a higher risk of hydroplaning, and reduced control in rain or snow. Worn tread doesn’t just cost you performance it can cost you a ticket, a blown tire, or worse, an accident.
The good news is that measuring tire tread takes less than five minutes, requires no special skills, and in most cases, no tools you don’t already have lying around. In this guide, we’ll walk through every reliable method for checking your tread depth, what the results mean, and when it’s time to replace your tires.
Understanding Tire Tread Basics
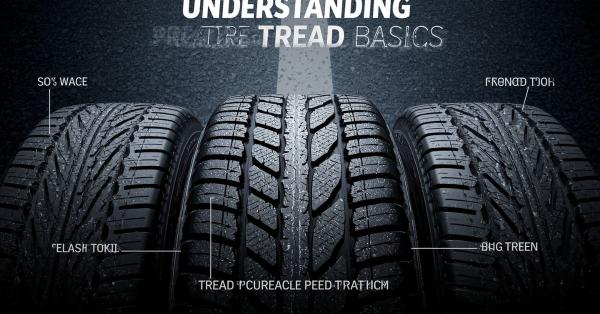
Tire tread refers to the grooved rubber pattern on the surface of your tire that makes contact with the road. Tread depth the distance from the top of the rubber to the bottom of the grooves is measured in 32nds of an inch. A brand-new tire typically starts with 10/32″ to 12/32″ of tread, depending on the model and manufacturer.
Not all tread patterns are built the same. Highway tires are designed with shallower, quieter patterns optimized for fuel efficiency and comfort. All-season tires strike a balance between wet and dry performance. Off-road and winter tires feature deeper, more aggressive grooves designed to bite into loose or slippery surfaces. Understanding what type of tire you have helps set realistic expectations for how it wears and how often you should check it.
Most regions set a legal minimum tread depth of 2/32″, below which a tire is considered unsafe and, in many places, illegal to drive on. However, legal doesn’t always mean safe. Many safety organizations recommend replacing tires well before they hit that threshold, particularly if you frequently drive in rain or snow.
The tread wears down gradually through normal driving, but the rate isn’t fixed. Mileage, driving style, road conditions, and vehicle alignment all play a role. Aggressive acceleration and braking accelerate wear, as does consistent under- or over-inflation. Regularly rotating your tires helps ensure wear happens evenly, extending their overall lifespan.
Signs You Need to Check Your Tread
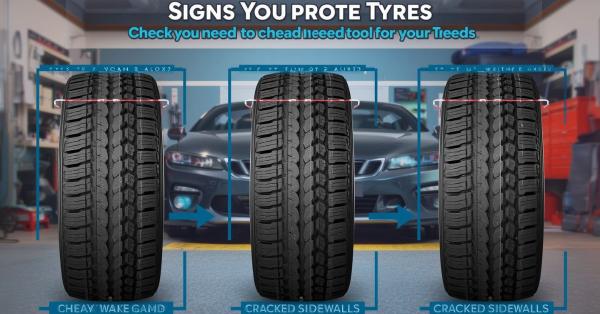
You don’t have to wait for a scheduled maintenance visit to know your tires need attention. Your car often gives you clues well before the tread becomes dangerously low. Learning to spot these signs early can save you from a blowout or a loss of control at the worst possible moment.
Start with a simple visual inspection. Run your eyes and hand across the surface of each tire, looking for smooth, shiny patches where the tread pattern has flattened out. Compare the inner, center, and outer sections noticeable differences often point to wear issues rather than simple aging.
Pay attention to how your car handles, too. If you notice your vehicle sliding more easily on wet roads, taking longer to stop, or feeling less stable during turns, worn tread could be the culprit. Hydroplaning where your tires lose contact with the road on wet pavement becomes far more likely as tread depth decreases.
Unusual vibrations or a growing hum from your tires while driving can also signal uneven wear, which sometimes develops alongside or instead of overall tread loss. This is often tied to alignment or suspension problems rather than simple mileage.
Finally, consider your tires’ age, not just their mileage. Tires can dry-rot or degrade internally even with tread that looks acceptable, especially after five to six years. If you’re unsure how old your tires are, check the DOT code on the sidewall, which includes the manufacturing date.
Method 1: The Penny Test
The penny test is the most well-known way to check tire tread, and for good reason it’s free, quick, and something almost everyone can do with a coin from their pocket. While it isn’t as precise as a dedicated gauge, it gives a reliable snapshot of whether your tires are approaching the legal minimum.
To perform the test, take a standard penny and hold it with Abraham Lincoln’s head facing downward. Insert the coin into one of the deeper grooves of your tire tread, pressing it in as far as it will comfortably go. Do this at a few different points around the tire, since wear isn’t always even across the surface.
Now look at how much of Lincoln’s head is visible above the tread. If the top of his head is completely covered by the rubber, your tread depth is greater than 2/32″, meaning you’re still within a legal and reasonably safe range. If you can see all of his head, including the top, your tread has worn down to 2/32″ or less the widely recognized legal minimum in most regions and it’s time to start shopping for replacement tires.
The main limitation of the penny test is that it only confirms whether you’ve hit the bare minimum; it doesn’t tell you exactly how much tread remains above that. For a more conservative safety margin, many drivers follow up with the quarter test, which we’ll cover next.
Method 2: The Quarter Test
The quarter test works exactly like the penny test, but it sets a higher, more conservative bar making it a better choice if you want an early warning rather than a bare-minimum check. It’s especially useful for drivers who regularly deal with rain, snow, or long highway commutes, where extra tread depth translates directly into better safety margins.
To perform the test, take a standard quarter and hold it with George Washington’s head facing downward. Insert it into one of the deeper grooves of your tire, the same way you would with the penny test, and check a few different spots around the tire’s circumference to account for uneven wear.
If the top of Washington’s head is completely covered by the tread, you have at least 4/32″ of tread remaining, a depth that most tire professionals consider a safer threshold for wet-weather driving, since it still leaves the tire enough grip to channel water effectively. If part of his head is visible, your tread is below 4/32″, and while you may still be within legal limits, it’s worth starting to plan for a replacement, particularly heading into rainy or winter seasons.
Many tire experts and safety organizations recommend using the 4/32″ quarter test as your real benchmark, rather than waiting until you hit the 2/32″ legal minimum from the penny test. Replacing tires a little earlier costs more upfront but meaningfully reduces your risk of hydroplaning or reduced traction in poor conditions.
Method 3: Built-In Tread Wear Indicator Bars
Most modern tires come with a built-in safety feature that makes checking tread depth even easier than the coin methods you just need to know where to look. These are called tread wear indicator bars, and nearly every tire manufactured today includes them as a standard design element.
Wear indicator bars are small, raised sections of solid rubber molded into the bottom of the main tread grooves, spaced at intervals around the tire. When the tire is new, these bars sit noticeably lower than the surrounding tread, so they’re not visible during normal inspection. As the tread wears down through regular driving, the rubber around the bars gradually wears away too, and the bars become more visible over time.
To check your tires using this method, look closely at the grooves running around the tire, particularly at the shallow ridges of rubber that cut across them. If the tread is level with or flush against one of these bars, it’s a clear sign that the tire has worn down to 2/32″, the industry-standard replacement point.
It’s important to check multiple wear bars around the tire, not just one, since wear can be uneven due to alignment, inflation, or driving habits. If the tread is flush with the bar in several locations, don’t wait to replace the tire; this indicator is designed specifically to remove the guesswork and give drivers a fast, built-in visual warning.
Method 4: Using a Tread Depth Gauge
While coin tests and wear bars are convenient, a tread depth gauge gives you the most accurate and specific measurement of all an exact number in 32nds of an inch, rather than a simple pass-or-fail estimate. These gauges are inexpensive, widely available at auto parts stores, and easy enough for any driver to use at home.
Tread depth gauges typically come in three styles: simple analog gauges with a sliding scale, digital gauges with a numeric readout, and probe-style gauges that combine both accuracy and affordability. Any of these will give you a reliable reading, so the choice mostly comes down to personal preference and budget.
To use one, place the small probe at the tip of the gauge into one of the tire’s grooves, making sure it’s straight and centered. Press the flat base of the gauge firmly against the tread surface until it sits flush, then read the depth measurement displayed on the scale or screen.
For the most accurate picture of your tire’s condition, don’t stop at a single measurement. Check the inner edge, center, and outer edge of the tread, since tires often wear unevenly depending on inflation levels and alignment. It’s also worth measuring at several points around the tire’s circumference rather than just one spot.
Compared to coin tests, a gauge removes the guesswork entirely, giving you a precise number you can track over time to monitor exactly how quickly your tires are wearing down.
Method 5: Tire Tread Apps and Smartphone Tools
As smartphone technology has advanced, a newer option has emerged for checking tread depth: dedicated apps and tools that use your phone’s camera to estimate wear. While these aren’t as widely used as coin tests or physical gauges, they offer a convenient, tech-forward alternative worth knowing about, especially for drivers who want a quick digital record of their tire condition over time.
Most of these apps work by having you photograph your tire’s tread from a specific angle, sometimes alongside a reference object like a coin or a printed marker for scale. The app then uses image analysis to estimate the tread depth based on shadow patterns and groove depth in the photo. Some tire manufacturers and retailers have released their own branded versions of this technology as part of broader tire-care or shopping apps.
The main advantage of this method is convenience: you can check your tread without keeping a coin or gauge in your car, and some apps let you log measurements over time to track wear trends. This can be especially useful for spotting gradual uneven wear before it becomes a bigger issue.
That said, these tools generally aren’t as reliable or precise as a physical tread depth gauge, since lighting conditions, camera quality, and photo angle can all affect accuracy. They’re best used as a supplementary check or quick reference rather than your primary method, particularly if you’re trying to determine whether it’s truly time to replace your tires.
Interpreting Your Results

Once you’ve measured your tread depth using any of the methods above, the next step is understanding what that number actually means for your safety on the road. Tread depth isn’t just a pass-or-fail measurement; it exists on a spectrum, and where your tires fall on that spectrum should influence how urgently you plan for replacement.
Tires typically start life with 10/32″ to 12/32″ of tread, depending on the model. At this stage, they offer maximum grip and water displacement in all conditions. As tread wears down to the 6/32″ to 8/32″ range, tires are still performing well, though it’s a good point to start monitoring wear more closely, especially before long trips.
Once tread reaches 4/32″ to 5/32″, performance on dry roads remains solid, but wet-weather traction begins to noticeably decline. This is the range many safety experts consider the real benchmark for replacement, particularly for drivers in rainy or snowy climates. Between 2/32″ and 3/32″, tires are approaching the legal minimum in most regions, and replacement should be a priority rather than an afterthought.
Below 2/32″, tires are illegal to drive on in most places and pose a serious safety risk, including significantly increased stopping distances and a high likelihood of hydroplaning in wet conditions.
It’s worth remembering that “legal” and “safe” aren’t always the same thing. Many drivers wait too long, treating the legal minimum as their target rather than replacing tires with a comfortable safety margin still intact.
Uneven Tread Wear: What It Means
Not all tread wear happens evenly, and the pattern your tires develop can actually tell you a lot about what’s going on with your vehicle. Recognizing these patterns early can help you fix an underlying issue before it damages a brand-new set of tires the same way.
Wear concentrated in the center of the tread, with the edges remaining relatively deep, usually points to over-inflation. When tire pressure is too high, the center of the tire bulges slightly and bears more of the vehicle’s weight, causing it to wear faster than the rest of the tread.
The opposite pattern wear along both outer edges with the center staying deeper typically signals under-inflation. Low pressure causes the tire to flatten out more than it should, putting extra stress on the edges rather than distributing weight evenly across the surface.
Wear concentrated on just one edge, rather than both, often indicates an alignment or camber issue rather than an inflation problem. This means the tire is sitting at a slight angle relative to the road, causing one side to drag more than the other during driving.
Cupping or scalloping a wavy, uneven pattern of high and low spots around the tire usually points to suspension problems, such as worn shocks or struts, rather than inflation or alignment.
If you notice any of these uneven patterns, it’s worth having a mechanic inspect your alignment, suspension, and tire pressure before simply replacing the tires, since the same issue will likely damage your next set too.
How Often to Check Tread Depth
Knowing how to measure tire tread is only useful if you actually make it a regular habit. Tread wear happens gradually, which makes it easy to overlook day to day, but building a simple routine ensures you catch problems long before they become safety risks.
As a general rule, checking your tread depth once a month is a good baseline for most drivers. This doesn’t need to be a formal process; a quick penny or quarter test while you’re already outside near your car takes less than five minutes and can be folded into routine tasks like washing your car or checking tire pressure.
Beyond the monthly check, it’s especially important to inspect your tread before any long road trip. Extended highway driving puts sustained stress on your tires, and discovering low tread halfway through a trip is far more inconvenient and dangerous than catching it beforehand.
Seasonal changes are another key trigger point. Checking your tread before winter arrives ensures you have adequate depth for snow and ice, while a pre-rainy-season check helps confirm your tires can still channel water effectively and resist hydroplaning. If you live somewhere with distinct seasonal weather shifts, tying your tread checks to these transitions is an easy way to remember.
Finally, if you’ve recently hit a pothole, curb, or rough patch of road, it’s worth doing an extra check outside your normal routine, since sudden impacts can accelerate wear or cause uneven damage that a monthly check might otherwise miss.
What to Do When Tread Is Low
Once your tread measurements show you’re approaching or past the recommended replacement range, the next step is deciding how to move forward. Acting promptly not only keeps you safer on the road but often saves money by preventing further damage to your vehicle.
Start by determining whether you need a full replacement or whether rotation and other maintenance can extend your tires’ life a little longer. If wear is even across all four tires and you’re simply approaching the 4/32″ to 2/32″ range through normal use, replacement is generally the right call. However, if you’re seeing uneven wear caused by alignment or inflation issues, addressing that root cause first can sometimes buy you more time before all four tires need replacing.
When shopping for replacement tires, match the type to your driving needs and climate rather than defaulting to the cheapest option. All-season tires work well for most drivers, but if you deal with regular snow or heavy rain, dedicated winter or performance tires may be worth the investment. It’s also worth replacing tires in pairs or as a full set when possible, since mismatched tread depths across axles can affect handling and stability.
Budget is understandably a factor for many drivers, but it helps to think of tire replacement as a safety expense rather than an optional upgrade. Financing options, seasonal sales, and mid-range tire brands can make quality replacements more affordable without compromising on the performance and traction your vehicle needs.
Don’t wait until tread is critically low to start this process shop early, and replace tires with enough of a safety margin still intact.
Common Mistakes People Make
Even drivers who know how to measure tire tread often fall into a few avoidable habits that reduce the effectiveness of their checks. Being aware of these common mistakes can help you get a more accurate picture of your tire’s true condition and avoid unpleasant surprises down the road.
One of the most frequent errors is checking only a single spot on the tire and assuming it represents the whole picture. Tread wear is rarely perfectly even, and a coin or gauge reading taken at just one point can miss significant wear elsewhere on the same tire. Always check multiple locations inner, center, outer, and several points around the circumference before drawing conclusions.
Another common mistake is ignoring uneven wear patterns rather than investigating their cause. Drivers often replace tires without addressing the underlying alignment, inflation, or suspension issue that caused the uneven wear in the first place, which simply leads to the same problem recurring with the next set of tires.
Perhaps the most significant mistake is treating the legal minimum of 2/32″ as a safe target rather than an absolute last resort. Many drivers wait until they’re right at, or dangerously close to, this threshold before considering replacement, even though performance especially in wet or snowy conditions starts declining well before that point. Relying on the more conservative 4/32″ benchmark from the quarter test gives a much safer margin.
Finally, some drivers forget to factor in tire age alongside tread depth, overlooking the fact that older tires can degrade internally even if the tread still looks reasonably intact.
Quick Reference Summary
Keeping track of tread depth is much easier when you have a simple chart to compare your measurements against. Use the table below as a fast reference guide whenever you check your tires, whether you’re using a coin, a wear bar, or a gauge.
| Tread Depth | Condition | Recommended Action |
| 10/32″ – 12/32″ | New tire | No action needed |
| 6/32″ – 9/32″ | Good condition | Monitor monthly |
| 4/32″ – 5/32″ | Fine for dry roads, reduced wet traction | Start planning for replacement |
| 2/32″ – 3/32″ | Below safety benchmark | Replace soon |
| Below 2/32″ | Illegal in most regions | Replace immediately |
As a general rule, the penny test tells you whether you’ve hit the legal minimum of 2/32″, while the quarter test confirms whether you’re still above the safer 4/32″ benchmark. Wear indicator bars offer a quick built-in visual check, and a tread depth gauge gives you the most precise number if you want to track wear over time.
It’s also worth remembering that this chart applies to overall tread depth, not uneven wear patterns. Even if your average depth looks acceptable, a tire that’s wearing unevenly on one edge or in the center may still need attention sooner than the numbers alone suggest. Pairing this quick reference with a visual inspection for uneven wear gives you the most complete picture of your tire’s true condition.
Keep this chart handy on your phone or printed in your glovebox so you always know exactly where your tires stand.
Conclusion
Measuring tire tread doesn’t require a trip to the shop, specialized training, or expensive equipment, just a few minutes of your time and, at most, a coin or a five-dollar gauge from an auto parts store. Whether you prefer the simplicity of the penny test, the added safety margin of the quarter test, the convenience of built-in wear bars, or the precision of a dedicated gauge, every method covered in this guide gives you a reliable way to stay ahead of dangerous tread wear.
The real key isn’t just knowing how to check your tread, it’s making that check a consistent habit. A quick monthly inspection, paired with checks before long trips and seasonal weather changes, ensures you’ll never be caught off guard by a tire that’s quietly worn past a safe threshold. Pay attention not just to overall depth, but to how evenly your tires are wearing, since uneven patterns often point to fixable issues with alignment, inflation, or suspension.
Ultimately, treating the legal minimum as a last resort rather than a target is one of the simplest ways to protect yourself, your passengers, and everyone else on the road. Tires are your only point of contact with the pavement, and a small investment of time checking them regularly can prevent accidents, save money on premature replacements, and give you real peace of mind behind the wheel.