
Ginger is one of the most versatile ingredients in the kitchen, prized for its warm, spicy flavor in everything from tea to stir-fries to baked goods. What many people don’t realize is just how easy it is to grow at home, using nothing more than a piece of ginger root you might already have in your kitchen. Whether you have a spacious garden, a small patio, or just a sunny windowsill, ginger can adapt to a variety of growing spaces with the right care.
Beyond the practical benefit of having fresh ginger on hand whenever you need it, the plant itself is attractive, with tall, reed-like stalks and lush green leaves that add a tropical touch to any space. This guide covers everything from selecting the right ginger to plant, through ongoing care, all the way to harvesting your own homegrown root, so you can grow a healthy, productive plant from start to finish.
Understanding Ginger as a Plant
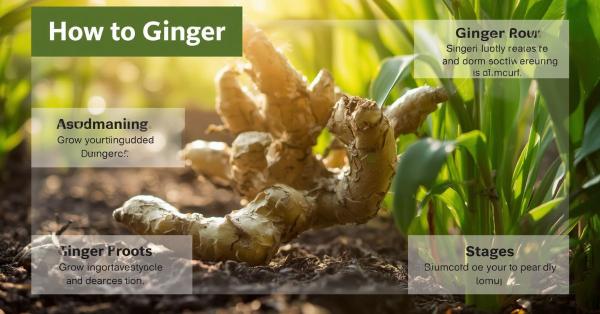
Before planting, it helps to understand exactly what ginger is and how it grows, since this knowledge shapes nearly every decision you’ll make throughout the growing process. Despite being commonly referred to as “ginger root,” the part we eat and plant is technically a rhizome, an underground stem that grows horizontally, sending out roots below and shoots above as it spreads.
Ginger is native to tropical and subtropical regions of Southeast Asia, which explains its preference for warm temperatures, high humidity, and protection from harsh, direct sunlight. Understanding this natural origin helps explain why replicating a warm, humid environment, whether outdoors in the right climate or indoors with a bit of extra care, is so important for successful growth.
Above the soil, ginger produces tall, narrow, reed-like stalks with elongated green leaves, giving the plant an attractive, tropical appearance even before any rhizomes are ready to harvest. Below the soil, the rhizome itself continues expanding outward over the growing season, gradually forming the knobby, branching root system familiar from grocery store ginger.
The overall growth timeline is fairly slow compared to many common garden plants. After planting, sprouting can take several weeks to a couple of months, followed by several more months of steady leaf and stalk growth above ground while the rhizome quietly expands below. Full maturity typically takes 8 to 10 months, making ginger a patient, long-term growing project rather than a quick harvest.
Choosing the Right Ginger for Planting
Success with growing ginger often starts before you even plant it, with choosing the right piece of ginger root in the first place. Not all ginger is equally suited for planting, so a bit of care at this stage can significantly improve your chances of healthy sprouting.
Store-bought ginger is the most common and accessible starting point for most home growers, widely available at grocery stores year-round. Nursery-sourced ginger or specialty seed ginger, though less common, is sometimes available through garden centers or online suppliers and tends to be specifically selected for propagation, often resulting in more reliable sprouting.
Organic vs. conventional ginger is an important distinction to understand. Conventionally grown ginger is sometimes treated with a growth inhibitor to prevent sprouting during storage and transport, which can make it significantly harder, or even impossible, to grow successfully. Choosing organic ginger whenever possible greatly improves your chances of successful sprouting, since it’s far less likely to have been treated this way.
When selecting a piece to plant, look for a plump, firm rhizome with smooth, unwrinkled skin, avoiding any pieces that feel soft, shriveled, or show signs of mold. Most importantly, check for visible “eyes,” or small growth buds, similar to those found on a potato, since these are the points from which new shoots will eventually emerge.
For those planning a larger harvest, starting with multiple plump pieces, each containing several healthy eyes, gives you a stronger foundation than relying on a single small piece alone.
Preparing Ginger for Planting
Once you’ve selected a healthy piece of ginger, a little preparation before planting can significantly improve your chances of successful sprouting and help prevent common issues like rot.
Cutting rhizomes into pieces is often necessary if you’re working with a larger piece of ginger, especially if you’d like to plant multiple sections rather than one whole rhizome. Using a clean, sharp knife, cut the ginger into smaller pieces, roughly 1-2 inches in size, being mindful of where the natural eyes are located.
Ensuring each piece has viable eyes is essential, since these small buds are the only points from which new growth will emerge. Aim for each cut piece to contain at least one, and ideally two, healthy-looking eyes to increase the likelihood of successful sprouting.
Curing or callusing cut pieces helps protect against rot once planted. After cutting, allow the pieces to sit out at room temperature for one to two days, giving the freshly cut surfaces time to dry slightly and form a protective callus. This simple step significantly reduces the risk of the exposed flesh rotting once it’s placed in moist soil.
Soaking dry or shriveled ginger can help revive pieces that seem a bit dehydrated before planting. Submerging the ginger in warm water for several hours, or overnight, helps rehydrate the rhizome and can encourage the eyes to begin sprouting more readily once planted.
Taking these preparatory steps, though simple, sets a much stronger foundation for the weeks of growth that follow.
Choosing the Right Growing Method
Ginger is fairly adaptable when it comes to growing setups, but understanding the pros and cons of each method helps you choose the best fit for your space, climate, and gardening goals.
Container growing is one of the most popular choices, especially for those with limited outdoor space or unpredictable climates. Wide, shallow pots work best, since ginger’s rhizomes spread horizontally rather than growing deep, and containers offer the added benefit of being easy to move indoors if temperatures drop unexpectedly. Look for pots at least 12 inches wide with good drainage holes to support healthy root spread.
In-ground garden bed growing suits those with warm climates and ample space, allowing rhizomes to spread more naturally over a larger area. This method often results in a more substantial harvest, since the plant isn’t restricted by container size, though it requires consistently warm temperatures throughout the growing season to thrive.
Raised beds offer a helpful middle ground between containers and traditional garden beds, providing better drainage control than in-ground planting while still allowing more room for rhizome expansion than a typical pot. This option works particularly well in regions with heavier, less well-draining native soil.
Indoor vs. outdoor growing ultimately depends on your climate. In warm, humid regions, ginger can often be grown outdoors year-round. In cooler climates, growing in containers that can be moved indoors during colder months, or growing entirely indoors near a sunny, humid window, allows gardeners nearly anywhere to successfully cultivate ginger regardless of local weather conditions.
Ideal Growing Conditions
Recreating ginger’s natural tropical environment as closely as possible is key to healthy growth, since this plant has fairly specific preferences when it comes to temperature, light, humidity, and soil.
Temperature range is one of the most important factors for successful growth. Ginger thrives in warm conditions, ideally between 68-86°F (20-30°C). Temperatures below this range can significantly slow growth or cause the plant to go dormant, while frost can kill the plant entirely, making temperature management especially important in cooler climates.
Light requirements for ginger differ from many sun-loving garden plants. Rather than full, direct sunlight, ginger actually prefers partial shade or dappled light, mimicking the filtered sunlight it would naturally receive growing beneath a forest canopy in its native tropical habitat. Too much direct, intense sun can scorch the leaves and stress the plant, particularly in hotter climates.
Humidity needs are another key consideration, since ginger naturally thrives in humid environments. Outdoors in naturally humid climates, this often isn’t a concern, but in drier regions or indoor settings, misting the plant regularly or placing a tray of water nearby can help increase local humidity around the foliage.
Soil type and drainage play a critical role in preventing one of the most common ginger-growing problems: rot. Ginger needs rich, well-draining soil that retains enough moisture to stay consistently damp without ever becoming waterlogged. Mixing in compost or organic matter improves both nutrient content and drainage, creating the loose, fertile growing medium ginger rhizomes need to expand and thrive beneath the surface.
Planting Step-by-Step
With your ginger prepared and growing conditions understood, it’s time to move on to the actual planting process. Following these steps carefully helps set your ginger up for strong, healthy growth from the very start.
Preparing the soil is the first step, regardless of whether you’re planting in a container, raised bed, or in-ground garden. Mix compost or other organic matter into your potting soil or garden bed to improve both fertility and drainage, creating the rich, loose growing medium ginger needs to thrive.
Planting depth and orientation matter significantly for successful sprouting. Place each ginger piece about 2 inches deep into the soil, ensuring the visible eyes are facing upward, since this is the direction new shoots will need to grow toward the surface. Planting too deeply can delay sprouting, while planting too shallow may expose the rhizome and increase the risk of drying out.
Spacing multiple pieces correctly becomes important if you’re planting more than one rhizome section in the same container or bed. Space pieces roughly 6-8 inches apart to give each one enough room to expand outward as the rhizome system grows over the coming months, without competing too closely with neighboring plants.
Initial watering after planting helps settle the soil around the newly planted ginger and provides the moisture needed to encourage sprouting. Water gently but thoroughly right after planting, then maintain consistently moist, but never soggy, soil conditions as you wait for the first signs of growth to appear over the following weeks.
Ongoing Care and Maintenance
Once your ginger is planted and beginning to establish itself, consistent, attentive care throughout the growing season plays a major role in how healthy and productive your final harvest will be.
Watering schedule should aim to keep soil consistently moist without ever becoming waterlogged. Check the top inch of soil regularly, watering whenever it begins to feel dry, while being careful to avoid letting the plant sit in standing water. Signs of overwatering include yellowing leaves and a musty smell, while underwatering typically shows up as dry, curling leaf edges.
Feeding schedule supports healthy growth throughout the season. Applying a balanced organic fertilizer or compost every few weeks during active growing months provides the nutrients ginger needs to develop both its foliage and underground rhizome system effectively.
Mulching around the base of the plant helps retain soil moisture, regulate temperature, and suppress competing weeds, all of which support more consistent growing conditions for the sensitive rhizome system developing beneath the surface.
Managing sunlight exposure may require some adjustment as the plant matures, particularly if grown outdoors where sun angles shift throughout the season. Providing afternoon shade during particularly hot periods helps prevent leaf scorch and reduces overall plant stress.
Repotting considerations become relevant for container-grown ginger that outgrows its original pot. If roots become tightly bound or growth appears stunted, moving to a larger, wider container gives the spreading rhizome system additional room to continue expanding, supporting a larger, healthier harvest by the time the growing season comes to an end.
Growth Stages and What to Expect
Understanding what typical ginger growth looks like at each stage helps set realistic expectations and makes it easier to recognize whether your plant is progressing normally or needs some adjustment in care.
Sprouting timeline marks the earliest stage of growth, and it requires patience. Depending on conditions like temperature and the quality of your starting ginger, sprouting can take anywhere from a few weeks to two months. During this stage, little visible activity happens above the soil, even as the rhizome begins establishing itself below.
Leaf and stalk development becomes noticeable once sprouting begins. Thin, reed-like green stalks emerge from the soil, gradually unfurling narrow, elongated leaves as the weeks progress. Over the following months, these stalks continue growing taller, often reaching one to four feet depending on growing conditions and variety, giving the plant an increasingly lush, tropical appearance.
Underground rhizome expansion happens gradually and mostly out of sight throughout the growing season. While you won’t see this directly, the original piece of ginger you planted is slowly branching outward, developing the knobby, multi-lobed structure familiar from store-bought ginger, fueled by the energy the above-ground foliage generates through photosynthesis.
Signs of a healthy, thriving plant include steady, consistent leaf growth, vibrant green coloring, and stalks that continue multiplying as the season progresses. A struggling plant, by contrast, might show yellowing leaves, stunted height, or little to no new growth over an extended period, often signaling an issue with watering, temperature, or light conditions that’s worth addressing promptly.
Pest and Disease Management
While ginger is generally a low-maintenance plant, it isn’t entirely immune to pests and diseases. Knowing what to watch for helps you catch and address problems early, before they seriously affect your plant’s health or harvest.
Common pests that occasionally affect ginger include aphids, small sap-sucking insects that cluster on new growth and can weaken the plant over time. Spider mites, though tiny and hard to spot, often leave behind fine webbing and stippled, discolored leaves. Fungus gnats, while usually more of a nuisance than a serious threat, tend to thrive in consistently overwatered soil and can indicate moisture levels need adjusting.
Common diseases are usually related to excess moisture. Rhizome rot, one of the most frequent issues in ginger cultivation, develops when soil stays too wet for extended periods, causing the rhizome to soften, discolor, and eventually decay. Various fungal issues can also arise in overly humid, poorly ventilated conditions, sometimes appearing as spots or discoloration on the leaves.
Organic pest control methods offer effective solutions without relying on harsh chemicals. Insecticidal soap or a diluted neem oil spray can help manage aphids and spider mites, while improving air circulation around the plant helps discourage fungus gnats and reduces overall fungal risk.
Prevention strategies ultimately come down to proper watering and drainage practices. Since most ginger health issues stem from excess moisture rather than pests alone, ensuring well-draining soil, avoiding overwatering, and maintaining good airflow around the plant go a long way toward preventing problems before they start.
Harvesting Ginger
After months of patient growth, harvesting is the rewarding final step, though timing and technique can vary depending on whether you’re after young, tender ginger or a fully mature harvest.
Baby ginger vs. mature ginger offers two distinct harvesting options. Baby ginger can be harvested as early as 4-6 months after planting, offering a milder flavor, thinner skin, and more tender texture, often preferred for pickling or fresh use. Mature ginger, harvested at 8-10 months, has the familiar tougher skin, stronger flavor, and fibrous texture associated with store-bought ginger, and it also stores considerably longer than its younger counterpart.
Signs the plant is ready to harvest typically appear above ground first. As the plant reaches maturity, the tall green stalks and leaves begin to yellow and gradually die back, signaling that the plant’s energy has shifted toward the rhizome and growth has largely finished for the season.
Harvesting without damaging remaining rhizomes requires a gentle approach, especially if you plan to leave part of the plant growing. Carefully loosen the soil around the base using a hand trowel or fork, then gently lift the rhizome cluster, brushing away excess soil without tugging forcefully, which could tear delicate root sections.
Partial vs. full harvesting gives you flexibility depending on your goals. You can break off smaller sections of the rhizome for immediate use while leaving the rest undisturbed in the soil to continue growing, or harvest the entire plant at once if you’re ready for a complete, final yield for the season.
Storing and Using Harvested Ginger
Once you’ve harvested your ginger, proper storage helps preserve its flavor and freshness, whether you plan to use it right away or keep a supply on hand for months to come.
Short-term storage works well for ginger you plan to use within a few weeks. Storing unpeeled ginger in the refrigerator, ideally wrapped loosely in a paper towel or placed in a partially open bag, helps maintain freshness while allowing some airflow to prevent excess moisture buildup. At room temperature, ginger typically stays fresh for about a week if kept in a cool, dry spot.
Long-term storage offers several options depending on your needs. Freezing whole or grated ginger preserves it for several months, and frozen ginger can even be grated directly from frozen without needing to thaw first. Drying sliced ginger, either using a dehydrator or a low oven, creates a shelf-stable product useful for teas or as a ground spice once fully dried and pulverized. Pickling ginger, a traditional method popular in many cuisines, both preserves the root and adds a distinct tangy flavor.
Saving a piece for replanting is a smart way to keep your growing cycle going. Set aside a healthy piece of your harvested ginger, ideally one with a visible eye, and store it properly until you’re ready to begin the planting process again for your next batch.
Using fresh homegrown ginger opens up plenty of culinary possibilities, from grating it into stir-fries and marinades to steeping it in tea, adding it to baked goods, or blending it into fresh juices and smoothies for a natural, spicy kick.
Growing Ginger Indoors Year-Round
For those in cooler climates or without outdoor growing space, ginger can be successfully grown indoors throughout the year with a bit of extra attention to its specific needs.
Best indoor conditions and placement start with finding a warm, bright spot away from cold drafts, such as near an east or south-facing window that receives indirect light rather than intense, direct sun. Kitchens and bathrooms often work particularly well, since these spaces tend to have naturally higher humidity levels that ginger appreciates.
Using grow lights becomes especially useful in homes without consistently bright natural light, or during shorter winter days when sunlight hours are limited. A simple grow light positioned a foot or two above the plant, run for several hours daily, can supplement natural light and help maintain steady growth throughout the year.
Managing indoor humidity often requires a little extra effort, since indoor air, particularly during winter months with heating systems running, tends to be considerably drier than ginger’s natural tropical environment. Regularly misting the leaves, using a small humidifier nearby, or placing the pot on a tray filled with pebbles and water can all help maintain the humidity levels ginger prefers.
Transitioning potted ginger indoors and outdoors seasonally offers a flexible middle-ground approach for many growers. During warmer months, moving containers outside allows the plant to benefit from natural sunlight, rainfall, and humidity, while bringing pots back indoors before temperatures drop in fall protects the plant from cold damage, allowing for a longer, more productive growing season overall.
Common Problems and Troubleshooting
Even with careful attention, ginger plants can occasionally run into issues. Knowing how to recognize and respond to common problems helps you course-correct quickly and keep your plant on track.
Yellowing leaves are one of the most frequently reported issues among ginger growers. While some yellowing is normal as the plant approaches natural maturity late in the season, early or widespread yellowing often points to overwatering, poor drainage, or insufficient nutrients. Checking soil moisture levels and adjusting your watering routine is usually the first step toward resolving this.
No sprouting after several weeks can be concerning, but it’s often explained by one of a few common causes. The ginger may have been treated with a growth inhibitor if it wasn’t organic, growing conditions may be too cold, or the piece simply may not have contained a viable eye. If several weeks pass with no visible activity in warm conditions, it may be worth trying a fresh piece.
Soft or mushy rhizomes are a clear sign of rot, almost always caused by excessively wet, poorly draining soil. If caught early, removing affected sections and improving drainage going forward may save the remaining healthy plant material; in more advanced cases, the affected piece may need to be discarded entirely.
Stunted growth often ties back to insufficient light, low temperatures, or nutrient-poor soil, making it worth reassessing your plant’s location and feeding schedule.
Pest infestations, while less common, should be addressed promptly using organic treatments like neem oil to prevent them from spreading and weakening the plant further.
Frequently Asked Questions
How long does ginger take to grow? Ginger is a slow-growing plant overall. Sprouting alone can take a few weeks to two months, and full maturity, when the rhizome is ready for a complete harvest, typically takes 8 to 10 months from planting. Baby ginger can be harvested earlier, around 4 to 6 months, for those who prefer a milder, more tender root.
Can I grow ginger from store-bought ginger? Yes, store-bought ginger is one of the most common starting points for home growers. For the best chance of success, choose organic ginger whenever possible, since conventional ginger is sometimes treated with a growth inhibitor that can prevent sprouting.
Does ginger need full sun? No, ginger actually prefers partial shade or dappled light rather than intense, direct sunlight. In its natural tropical habitat, it typically grows beneath a forest canopy, so replicating filtered light conditions tends to produce healthier growth than full sun exposure.
Can ginger be grown indoors year-round? Yes, ginger can be successfully grown indoors with the right conditions, including warm temperatures, indirect bright light, and adequate humidity. Using grow lights and misting the plant regularly can help replicate its preferred tropical environment in indoor settings.
How do I know when ginger is ready to harvest? The clearest sign is the foliage itself. As the plant reaches maturity, the green stalks and leaves begin to yellow and die back, signaling that the plant’s energy has shifted toward the rhizome and it’s ready to be harvested, whether partially or in full.
Conclusion & Quick-Reference Checklist
Growing ginger at home is a patient but genuinely rewarding process, transforming a simple piece of root into a lush, tropical-looking plant that eventually provides a steady supply of fresh, aromatic ginger for your kitchen. From choosing the right starting piece to understanding its unique growing needs and recognizing the signs of a healthy harvest, this guide has covered everything needed to grow ginger successfully, whether indoors, outdoors, or somewhere in between.
Use this quick checklist to guide your growing journey:
Getting Started
- Choose plump, organic ginger with visible eyes
- Cure cut pieces for 1-2 days before planting
- Select a wide, shallow container or well-draining bed
Growing Conditions
- Maintain temperatures between 68-86°F
- Provide partial shade or filtered light
- Keep soil consistently moist, never soggy
- Support humidity, especially indoors
Ongoing Care
- Water regularly, checking top-inch soil moisture
- Feed with organic fertilizer every few weeks
- Watch for pests and rot, addressing issues early
- Repot container-grown ginger as needed
Harvesting
- Baby ginger: 4-6 months
- Mature ginger: 8-10 months
- Harvest once leaves yellow and die back
- Save a healthy piece for replanting
With consistent care and a bit of patience, growing ginger becomes an ongoing, self-sustaining cycle, allowing you to enjoy fresh, homegrown root again and again while adding a beautiful, tropical touch to your garden or indoor space.